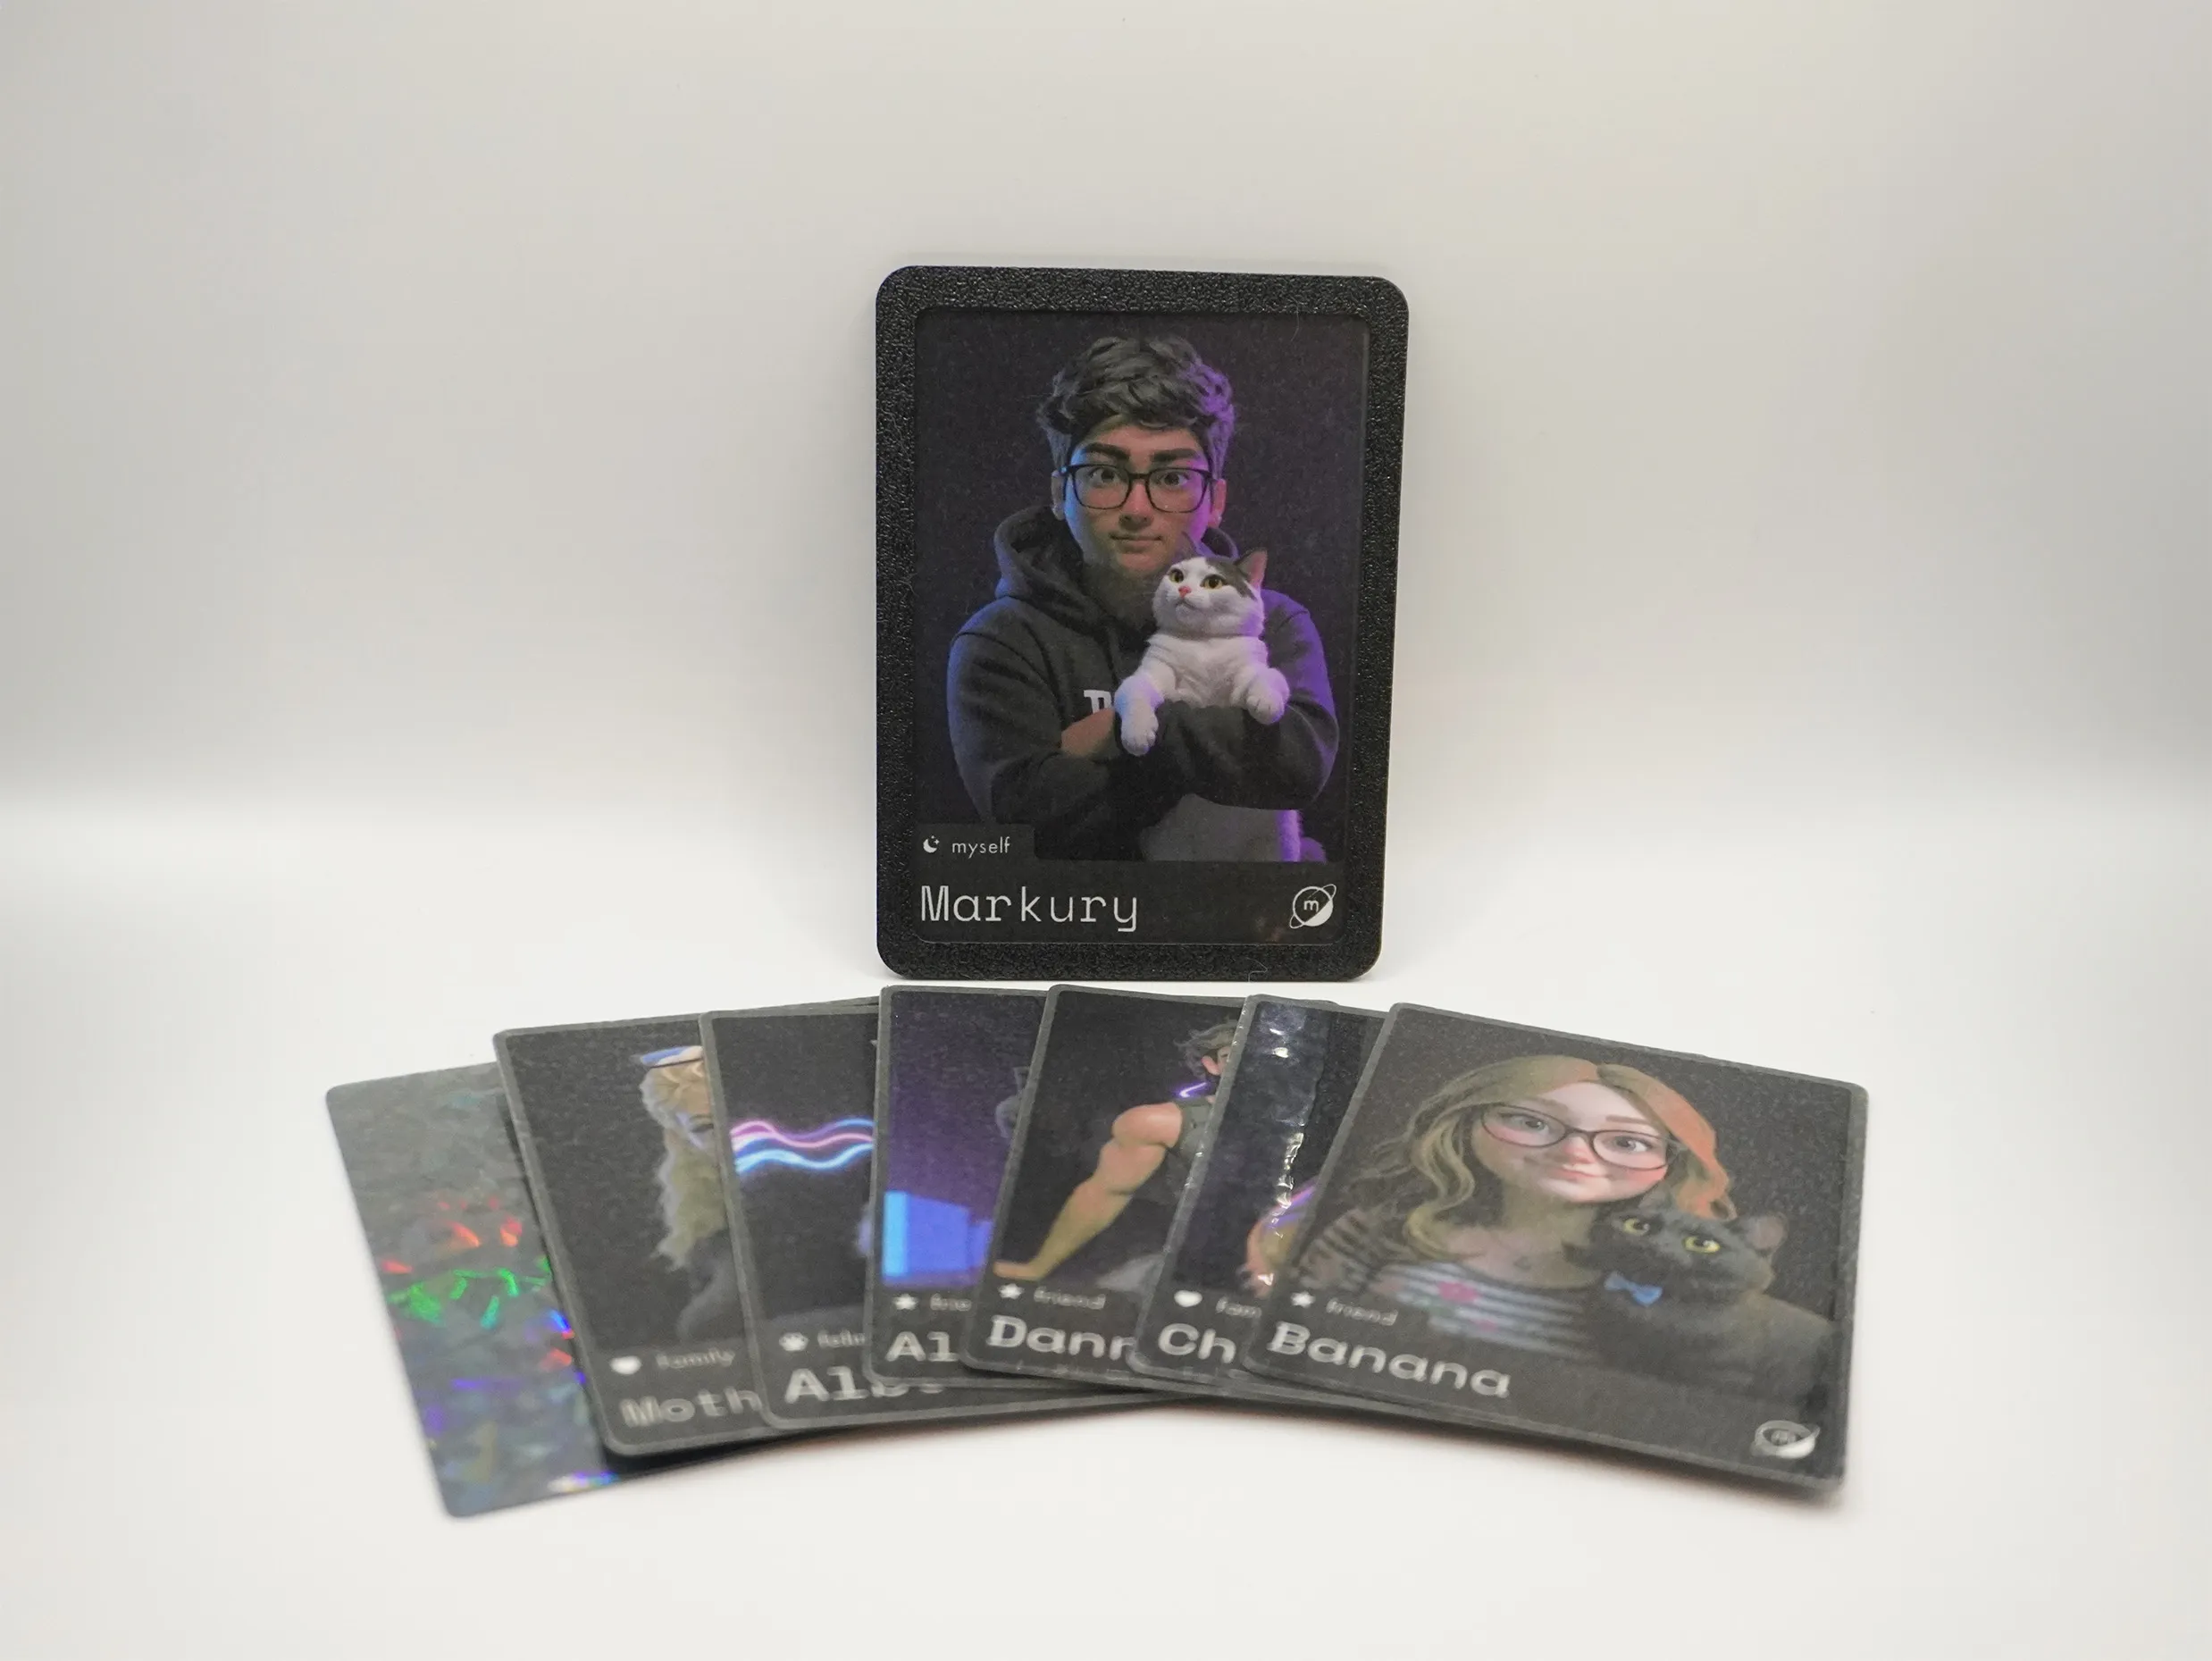
I had this idea a few days ago to make collectible cards of the important people in my life. While Pokemon’s full art cards were an inspiration, I wanted something more minimal - no abilities or stats that might reduce people to game pieces. Just clean portraits with a dark theme, each person’s “class” marked in SF Symbols (Friend, Family, Feline), and my design system incorporated throughout.
The Base Cards
The basic production was straightforward: print the designs on cardstock, flip them over for the backs (since my inkjet doesn’t do duplexing), thermal laminate for durability, and add holographic film to the logo backings. The vinyl cutter handled all the cuts - it’s just more precise than hand-cutting for the border widths and rounded corners.
For the artwork, I went with 3D-style renders from my favorite diffusion model. For most people close to me, I already had either a FLUX LoRA trained or a dataset from an SDXL LoRA, so some recaptioning and training later allowed me to get all everyone on the same model. I combined these with a few Pixar-style LoRAs from Civitai (after my attempt at training one fell flat) and rendered each subject in a similar style and environemtn. Yes, it gives everyone a cleft chin, but the results were worth it. Training only took a few hours per person running with high batch sizes on an L40s - honestly a sweet spot for training large models like Flux, performing like an H100 at A100 prices.
The final renders used a combination of these LoRAs, in addition to the personalized ones:
- Jixar Flux by juaner0211589
- 3DMM_FLUX by LONGD
- 3D_Flux Style by sadsilly
The Frame Challenge
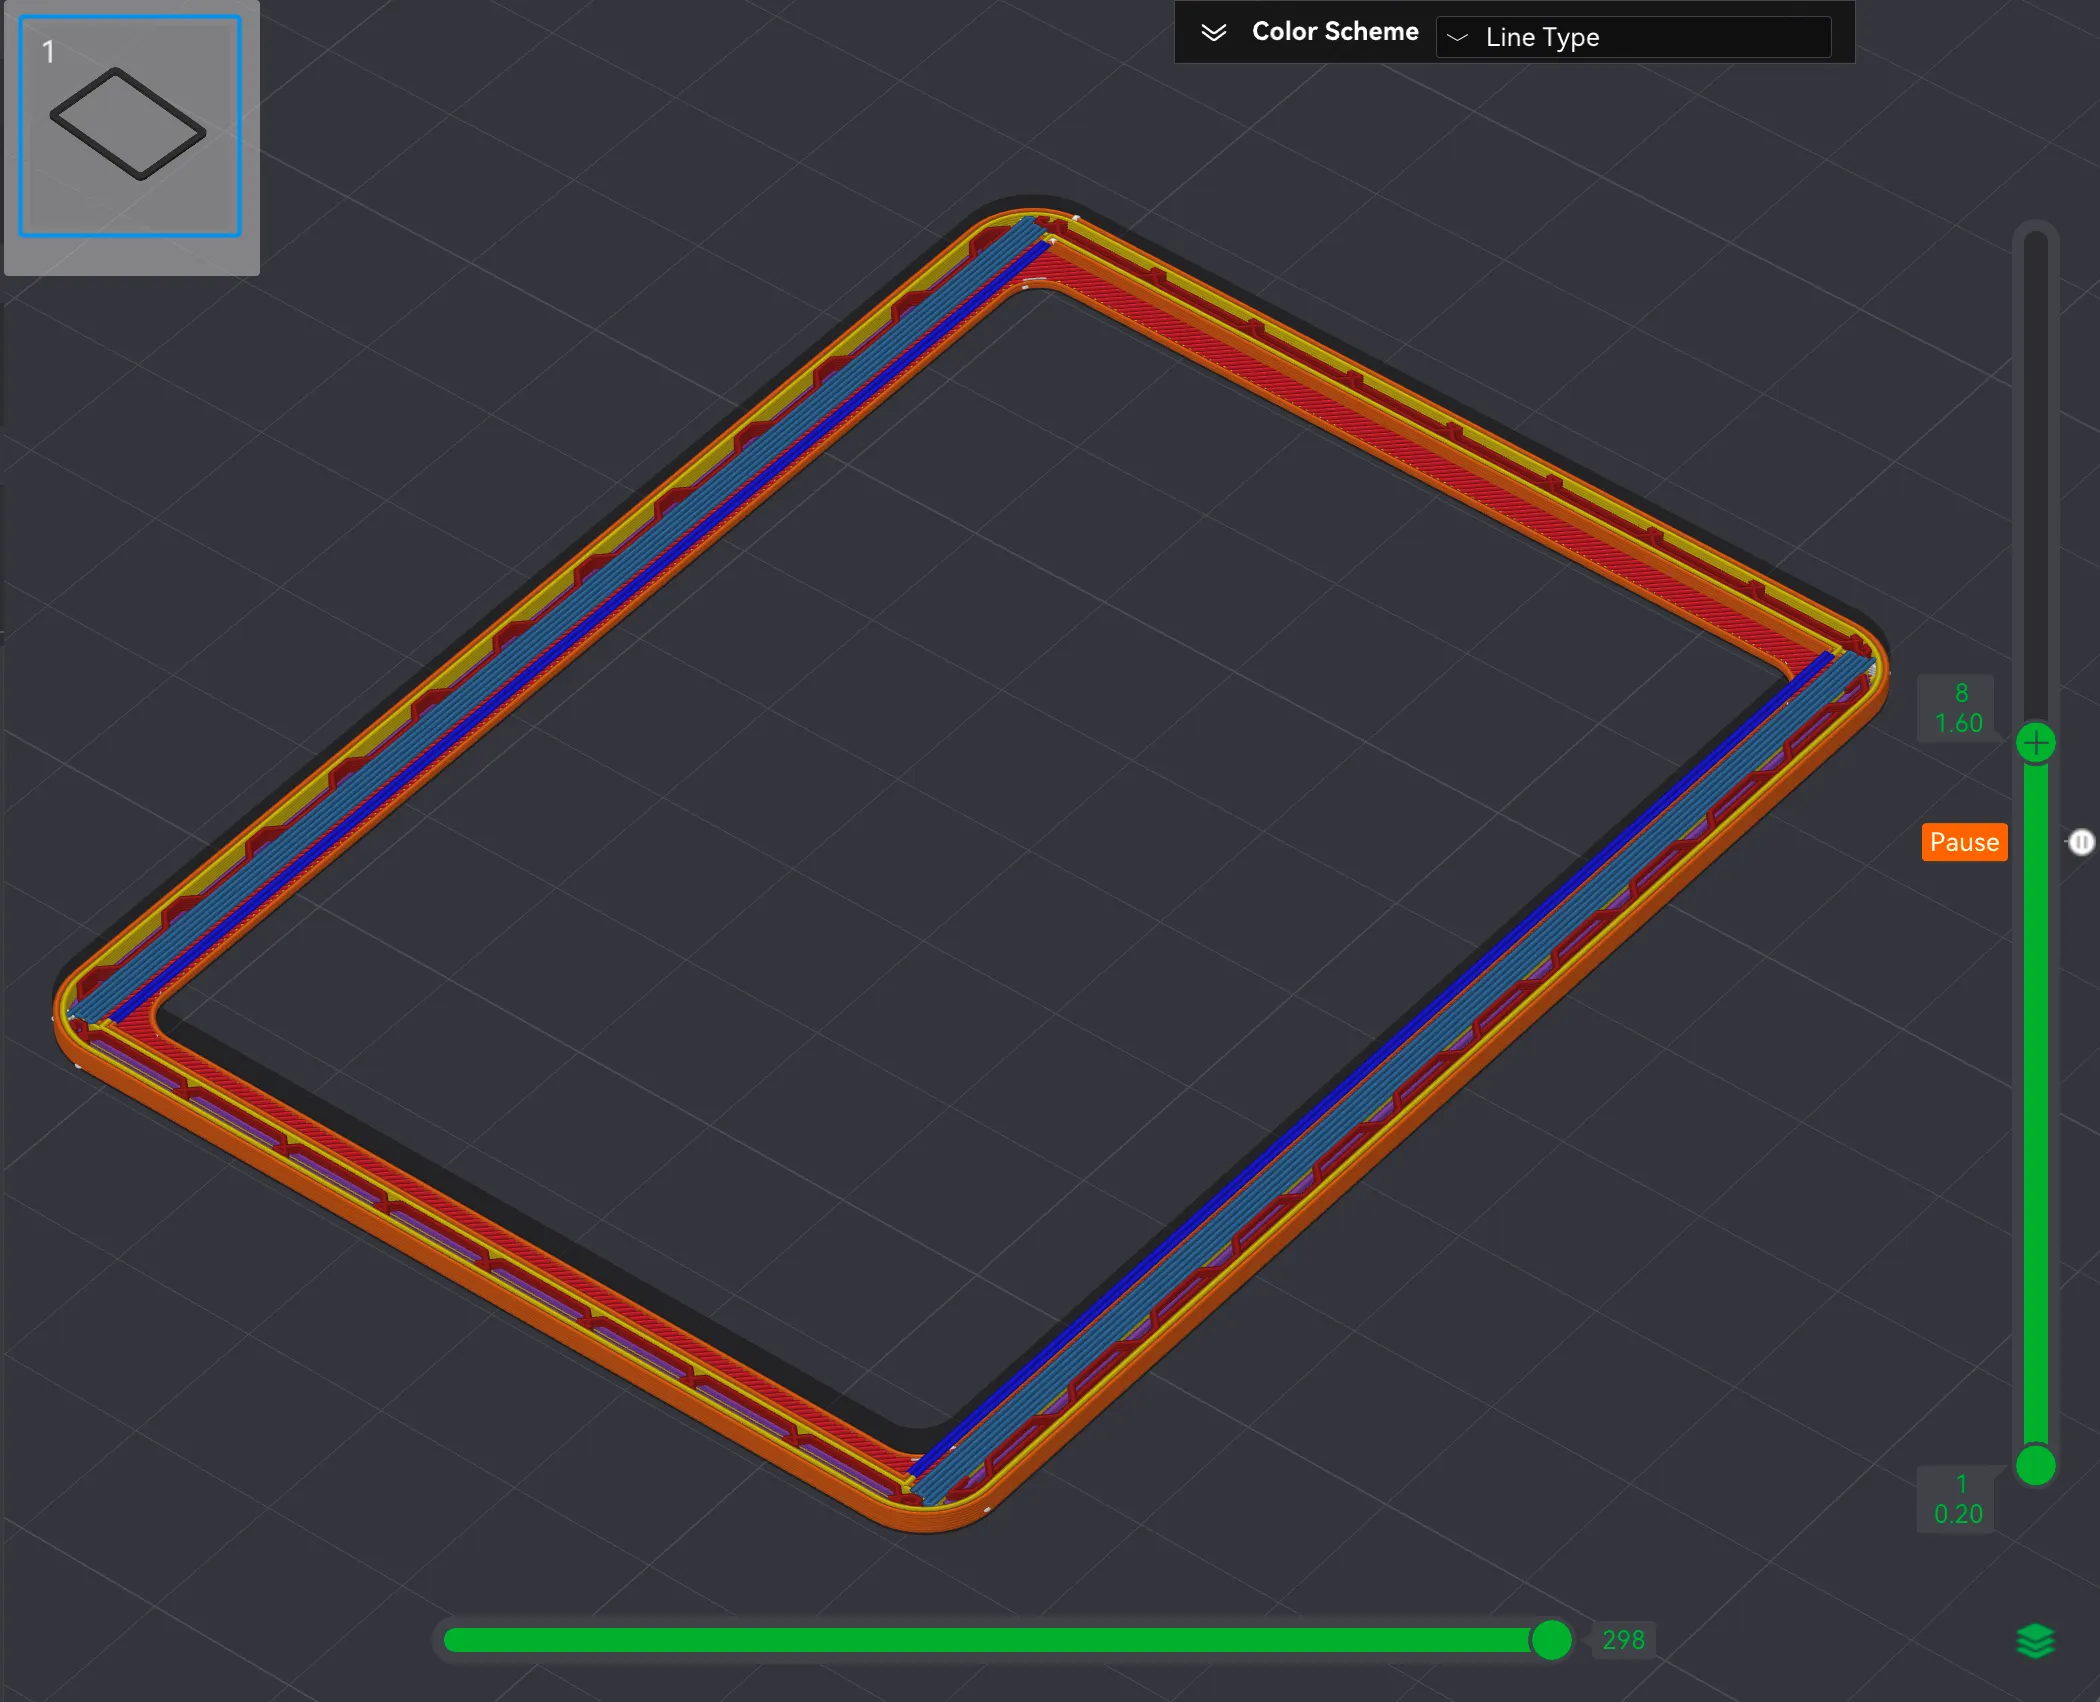
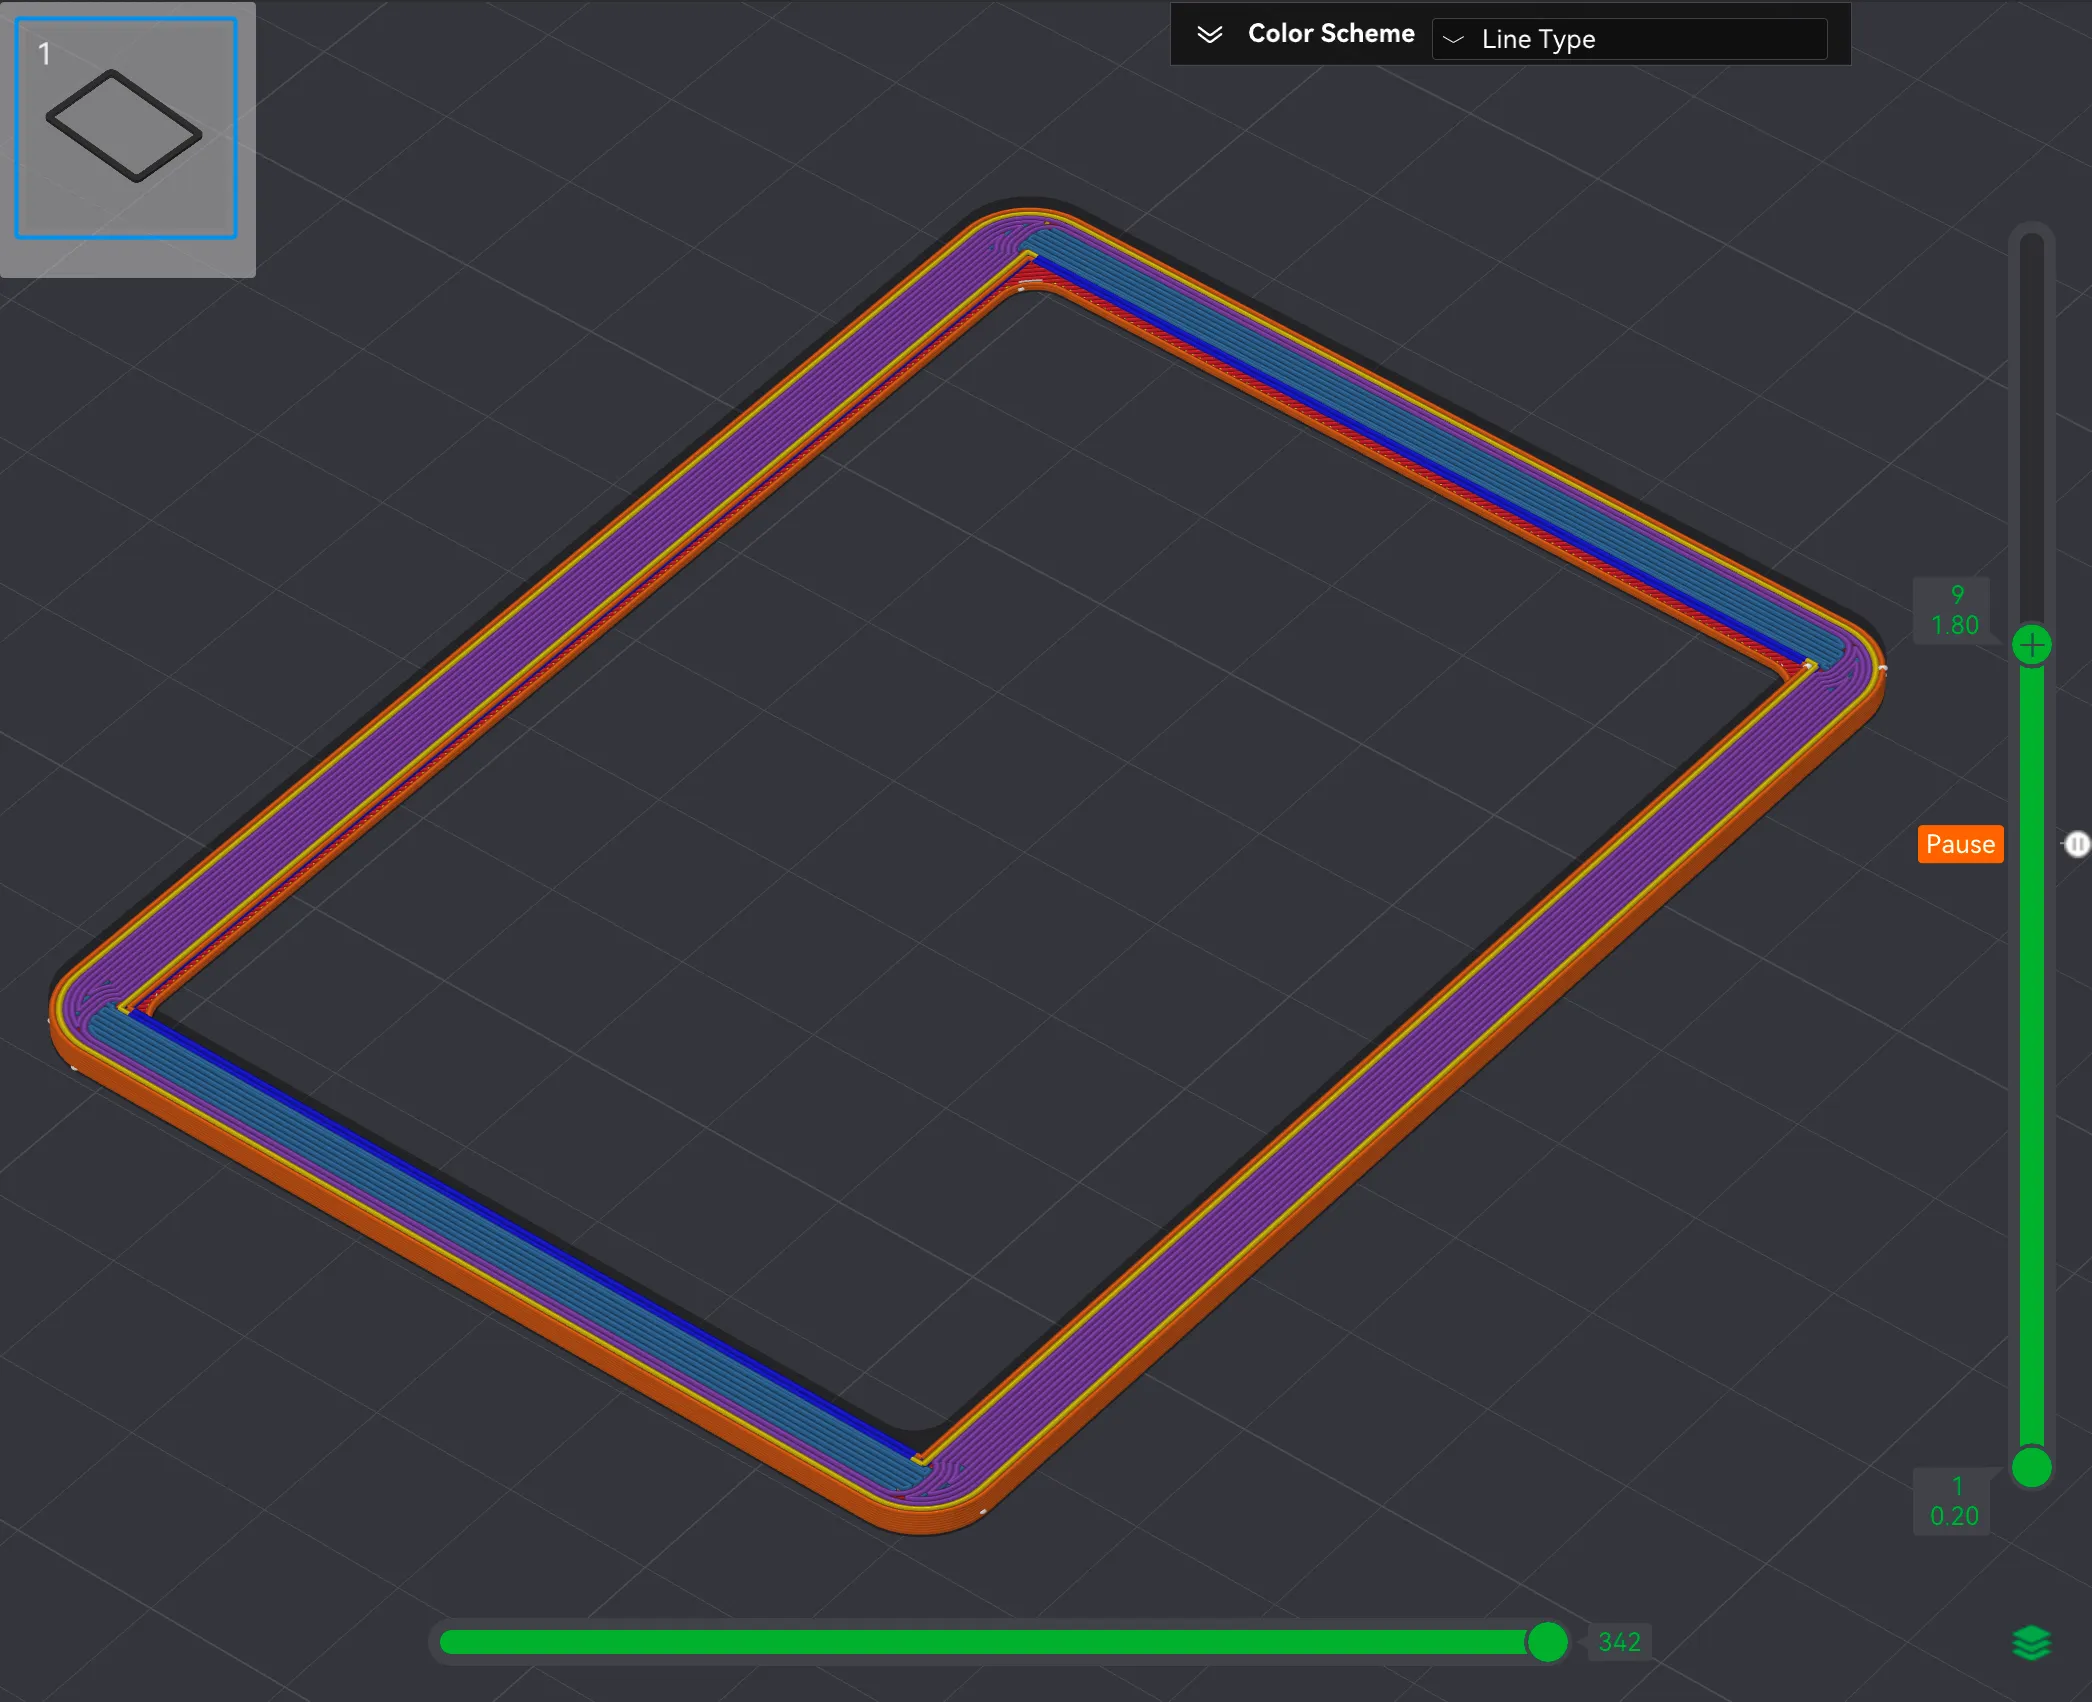
The frames were where things got interesting. I wanted to 3D print borders on both sides of the cards, but quickly discovered that printing directly onto laminated cards wasn’t feasible without some interface layer. Usually, we’d use PEI or glue to help filament adhere, but that wasn’t practical here unless I wanted to get into elaborate kapton tape masking (I didn’t).
Then I remembered reading about a technique for printing holes without supports - originally from nophead’s HydraRaptor blog, later expanded on by Makers Muse. The principle is using strategic bridging to avoid support material. While they focused on circular holes, the concept adapted perfectly to rectangular card frames.
The implementation is surprisingly simple: two single-layer (0.2mm) bridges in perpendicular directions. The first layer bridges across Y, the second across X. While the bridges span about 3 inches, the card itself provides just enough support without needing adhesion. Only the tiny radii of the rounded corners print truly unsupported, but good cooling takes care of those.
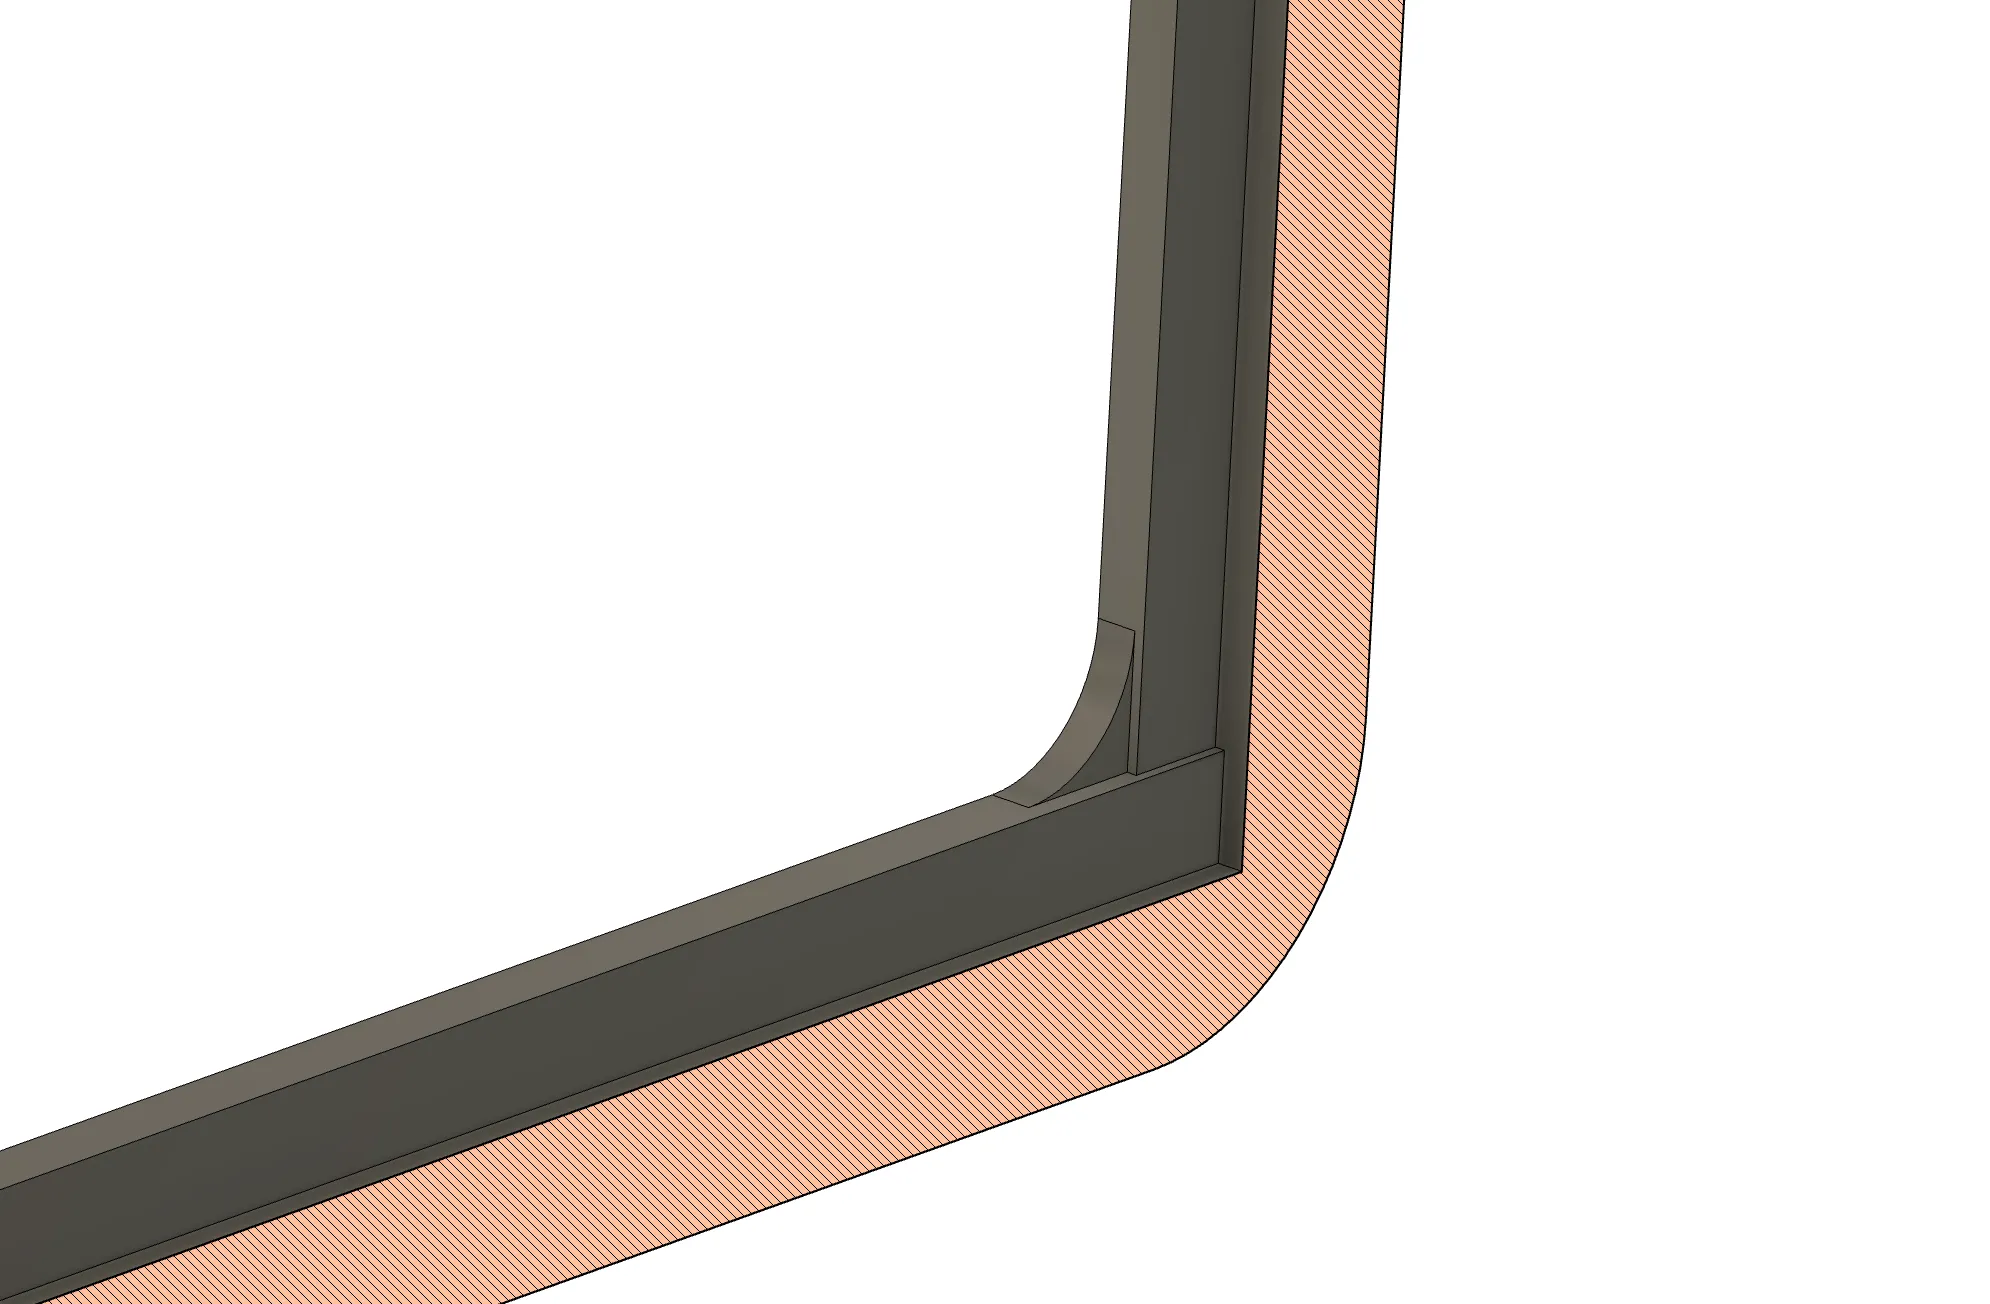
Getting it to print cleanly needed some slicer tweaks in Bambu Studio. I set “Avoid crossing walls” to 999mm (it’s a crude feature but it works, and the default value of 0 disables it), added a pause to insert the cards, and carefully positioned everything so the toolhead wouldn’t disturb the magnets holding the cards in place. After that, it printed beautifully with no special speed adjustments - the bridging moves are naturally slower anyway.
Limited Edition By Design
I’m making exactly two copies of each card - one for my collection, one for the subject. Then symbolically “deleting” the files (though we all know how deletion really works). My mom immediately requested 50 copies to use as “calling cards”, which is endearing but misses the point somewhat. Also, she might be underestimating the hour-per-batch production time.
The holographic element ended up being its own puzzle - the sheets only came in A4 rather than letter size. Ended up rotating 90 degrees and reorganizing the prints to fit within the Brother Scan-N-Cut’s registration marks, added through their Illustrator plugin (acquired through a surprisingly involved email exchange with an Australian shop that literally sent me a photo of a registration card). They are also a little more opaque than I expected, so I didn’t apply them to the front. On primarily dark designs, the holographic patterns are overwhelming and too difficult to see through.
The Files
The frame model is available on MakerWorld if you want to make your own. The design accommodates cards up to 0.8mm thick (which worked perfectly for my laminated cards) with an inner cutout of 2.5” x 3.5” (standard trading card size). All the border thicknesses and corner radii are parameterized in the STEP file if you want to adjust the aesthetics.
So that’s the project - a personal spin on collectible cards, with some interesting technical challenges along the way. The frames might be a bit overengineered, but sometimes the best solutions come from remembering random blog posts about printing holes.